×
- Live Chat
- 1-888-505-1906

My Garage
My Account
Cart
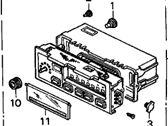
Genuine Acura Legend A/C Switch
Air Conditioning Switch- Select Vehicle by Model
- Select Vehicle by VIN
Select Vehicle by Model
orAcura
Legend
Year
Select Vehicle by VIN
For the most accurate results, select vehicle by your VIN (Vehicle Identification Number).
8 A/C Switches found
Acura Legend A/C Switch
We provide a broad range of OEM Acura Legend A/C Switch at unbeatable prices on our website. For your OEM parts, You can count on the guaranteed quality, manufacturer's warranty, outstanding customer service, and prompt delivery. We look forward to your visit.
Acura Legend A/C Switch Parts Questions & Experts Answers
- Q: How to remove and install the control assembly on Acura Legend?A: Legend models begin with disconnecting the negative cable from the battery. The front console and the radio are then removed. The four mounting screws are removed next, followed by detaching the heater control cable. The A/C Switch is then pulled out of the dash far enough to unplug the electrical connector, and then pulled the rest of the way out of the dash. Installation is the reverse of removal. The engine is run and checked for proper functioning of the heater and air conditioning. For Integra models, the process starts with disconnecting the negative cable from the battery. The glove compartment is then removed. The hole covers and the mounting screws are removed next. The control is pulled out slightly. The air mix cable at the clamp is marked to ensure installation in the same position, and then disconnected. The wiring from the A/C Switch is detached and the assembly is lifted from the dash. To install the unit, the above procedure is reversed. To adjust the cable, the mark made is aligned. The clip is fastened and checked for stiffness or binding through the full range of operation. The engine is run and checked for proper functioning of the heater and air conditioning, if equipped.


