×
- Live Chat
- 1-888-505-1906
My Garage
My Account
Cart
Genuine Acura TL Clutch Disc
Friction Disc- Select Vehicle by Model
- Select Vehicle by VIN
Select Vehicle by Model
orMake
Model
Year
Select Vehicle by VIN
For the most accurate results, select vehicle by your VIN (Vehicle Identification Number).
3 Clutch Discs found


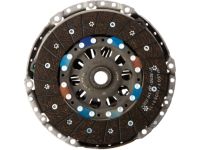
Acura TL Clutch Set
Part Number: 22105-PGE-325$423.68 MSRP: $605.08You Save: $181.40 (30%)Ships in 1-3 Business Days

Acura TL Friction Disk
Part Number: 22200-R4N-003$358.15 MSRP: $511.50You Save: $153.35 (30%)Ships in 1-3 Business Days

Acura TL Clutch Disc
We provide a broad range of OEM Acura TL Clutch Disc at unbeatable prices on our website. For your OEM parts, You can count on the guaranteed quality, manufacturer's warranty, outstanding customer service, and prompt delivery. We look forward to your visit.
Acura TL Clutch Disc Parts Questions & Experts Answers
- Q: How to remove and install Clutch Disc,Pilot Bearing and Pressure Plate on Acura TL?A: A special tool setup is required to compress the clutch pressure plate during clutch removal and installation; attempting this procedure without the special tools is not advisable. Access to the clutch components is typically achieved by removing the transaxle while leaving the engine in the vehicle. If the engine is being removed for major overhaul, it is prudent to check the clutch for wear and replace worn components as necessary, as the relatively low cost of clutch components justifies their replacement whenever the engine or transaxle is removed, unless they are new or in near-perfect condition. The transaxle should be removed from the vehicle while supporting the engine from above. The Clutch Fork and Release Bearing can remain attached to the transaxle housing. Inspect the flywheel and pressure plate for indexing marks, and if they are not found, create your own marks to ensure proper alignment during installation. Install the special factory tool assembly to compress the diaphragm spring, then loosen the pressure plate-to-flywheel bolts in the specified pattern. It is essential to use this tool to avoid damaging the pressure plate. After loosening the bolts, carefully remove the pressure plate and clutch disc. During inspection, check the flywheel for cracks and other defects, and machine it flat if necessary. Inspect the clutch disc lining for wear, ensuring at least 1/16-inch of lining above the rivet heads, and check for any damage. The release bearing should also be replaced along with the clutch disc. Examine the pressure plate for excessive wear or damage, and replace it if necessary. Before installation, clean the flywheel and pressure plate surfaces thoroughly, ensuring no oil or grease is present. Position the clutch disc against the flywheel, aligning the marks, and insert the clutch portion of the special tool into the pilot bearing. Install the compressor portion of the tool and tighten it to compress the diaphragm spring, then tighten the pressure plate-to-flywheel bolts gradually until the specified torque is reached. Lubricate the inner groove of the release bearing and the contact areas of the release lever and transaxle input shaft bearing retainer. For pilot bearing replacement, remove the flywheel and drive the pilot bearing out from the friction surface side toward the crankshaft side, then lubricate and install the new pilot bearing. For 2007 and later models, use a slide hammer to remove the pilot bearing and drive the new one into place, ensuring the seal end faces the transmission.