Contact Us Live Chat or 1-888-505-1906
My Garage
My Account
Cart
Make sure this part fits

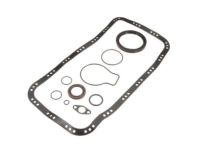
Acura 20011-P80-A51 Transmission Assembly (Mt)

1996-1998 Acura Integra 20011P80A51

Customer Questions & Expert Answers (4)
Acura 20011-P80-A51 Transmission Assembly (Mt)
  • Part Description
    Transmission Assembly (Mt)
  • Replaced By
    20011-P80-A52
  • Manufacturer
    Acura
  • Manufacturer's Notes
    This part is discontinued.
Make sure this part fits
  • Related Parts
  • Product Specifications
  • Vehicle Fitment
  • Customer Questions & Expert Answers
  • Product Specifications

    BrandGenuine Acura
    Manufacturer Part Number20011-P80-A51
    Part DescriptionTransmission Assembly (Mt)
    Item Dimensions25.5 x 19.7 x 19.6 inches
    Item Weight99.40 Pounds
    ConditionNew
    Fitment TypeDirect Replacement
    ManufacturerAcura
    SKU20011-P80-A51
    WarrantyThis genuine Acura part is guaranteed by Acura's factory warranty.
    Shipping & ReturnShipping Policy Return Policy
    Warning: California’s Proposition 65
  • Vehicle Fitment

    Year Make Model Body & Trim Emission & Transmission
    1998 Acura Integra3 Door GS, 3 Door LS, 3 Door RS, 4 Door GS, 4 Door LSKA 5MT
    1997 Acura Integra3 Door GS, 3 Door LS, 3 Door RS, 4 Door GS, 4 Door LSKA 5MT
    1996 Acura Integra3 Door LS, 3 Door RS, 4 Door LS, 4 Door RSKA 5MT
  • Customer Questions & Expert Answers

    Q:
    Do you have this part to fit my car? Posted by AcuraPartsWarehouse Specialist
    A:
    You can Select Your Vehicle to check if 20011-P80-A51 fits your vehicle.
    Posted by AcuraPartsWarehouse Specialist
    Q:
    How do you remove and install a manual transaxle on Acura Integra? Posted by Customer
    A:
    To remove the transaxle, first disconnect the negative and then the positive battery cables, ensuring to have the anti-theft code for the radio if applicable. Next, remove the resonator, intake air duct, and air cleaner housing, followed by disconnecting the starter motor cables and removing the upper starter motor mounting bolt. Disconnect the transaxle ground cable, unplug the back-up light switch connector, detach the wiring harness clamp from the transaxle, and unplug the vehicle speed sensor electrical connector. Loosen the driveaxle/hub nut, loosen the front wheel lug nuts, raise the vehicle securely on jackstands, and remove the front wheels. If equipped, remove the splash shield and the elbow-shaped exhaust pipe section under the transaxle, then drain the transaxle lubricant. For specific models, disconnect the shift and extension rods or shift cables from the transaxle. Remove the clutch fluid hose-to-clutch fluid pressure line junction, the clutch fluid pressure line, the release cylinder, and the release cylinder pushrod, taking care not to bend the clutch fluid pressure line. Remove the driveaxles, detach the driveshaft from the transfer case flange if applicable, and remove the engine stiffener if equipped. Remove the clutch access cover bolts and the cover, then remove the distributor mounting bolt and support the engine with an engine hoist. Remove the side guards if equipped, support the transaxle with a jack, and secure it with a safety chain. Remove the right side transaxle mounting bracket bolts and nuts, the four upper transaxle-to-engine mounting bolts, the clutch hydraulic line supporting bracket bolts, the rear lower transaxle-to-engine bolt, and the lower transaxle-to-engine bolt and mounting bracket bolts. Ensure all wires and hoses are disconnected from the transaxle, then carefully pull the transaxle and jack away from the engine. Once the input shaft is clear, lower the transaxle and remove it from under the vehicle, allowing access to the clutch components for inspection and potential replacement. For installation, if the clutch components were removed, install them and ensure the dowel pins are in place. Secure the transaxle to the jack with a chain, raise it into position behind the engine, and carefully slide it forward, engaging the dowel pins and input shaft. Install the transaxle housing-to-engine bolts and the rear mounting bracket bolts, tightening them to the specified torque. Install the upper transaxle-to-engine bolts and the lower starter motor mounting bolt, then raise the transaxle slightly to install the right transaxle mounting bracket and tighten the bolts and nuts. Install the front stopper bracket and tighten the bolts, remove the chain hoist, and install the distributor mounting bolt. Install the clutch cover and engine stiffeners if applicable, tightening all bolts to the specified torque. The remainder of the installation follows the reverse order of removal. Refill the transaxle with the specified lubricant and bleed the clutch hydraulic system before conducting a road test for proper operation and checking for leaks.
    Posted by AcuraPartsWarehouse Specialist
    Q:
    What is involved in overhauling a manual transaxle for the 1995 Acura Integra? Posted by Customer
    A:
    Overhauling a manual transaxle involves the disassembly and reassembly of numerous small parts, requiring precise measurements of clearances and potential adjustments using select fit spacers and snap-rings.
    Posted by AcuraPartsWarehouse Specialist
    Q:
    How should the torque converter be positioned during installation for the 1995 Acura Integra? Posted by Customer
    A:
    Ensure the torque converter hub is securely engaged in the pump, raise the transaxle into position while keeping it level, and align the torque converter with the driveplate using the previously made marks.
    Posted by AcuraPartsWarehouse Specialist
    If you have any questions about this product, please don't hesitate to ask us. We will be happy to help you!

Genuine Acura Part 20011-P80-A51, the Right Choice

To ensure reliability, purchase Acura part # 20011-P80-A51 Transmission Assembly (Mt). It is sometimes referred to as Acura Transmission Assembly. When it comes to quality and durability, OEM parts reign supreme. They are manufactured to meet Acura's exacting factory specifications and undergo rigorous quality control. This part fits 1996-1998 Acura Integra.

AcuraPartsWarehouse.com is a leading supplier of genuine Acura parts and accessories such as Acura 20011P80A51 Transmission Assembly (Mt). Welcome to our website where you can procure brand new OEM Acura parts. We boast a wide array of genuine Acura parts at competitive prices. If you're seeking a combination of quality, reliability, durability, and affordability, you've come to the right place. All our parts are backed by a manufacturer's warranty for your peace of mind.

Why choose Acura Parts Warehouse

  • Dedicated Service

    Your complete satisfaction is our #1 goal

  • Lowest Prices

    Best deals on genuine OE parts from dealerships

  • Fast Delivery

    Orders are processed and delivered promptly