×
- Live Chat
- 1-888-505-1906
My Garage
My Account
Cart
Genuine Acura Integra A/C Switch
Air Conditioning Switch- Select Vehicle by Model
- Select Vehicle by VIN
Select Vehicle by Model
orMake
Model
Year
Select Vehicle by VIN
For the most accurate results, select vehicle by your VIN (Vehicle Identification Number).
17 A/C Switches found
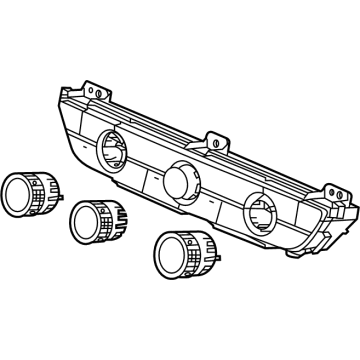
Acura Integra Switch Nh900L
Part Number: 79610-T22-A31ZA$198.46 MSRP: $283.43You Save: $84.97 (30%)Ships in 1-2 Business Days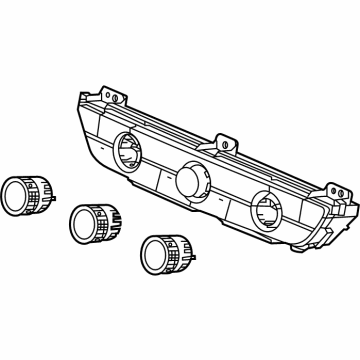
Acura Integra Switch Nh900L
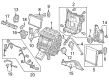
Part Number: 79610-T20-A31ZB$216.75 MSRP: $309.55You Save: $92.80 (30%)Ships in 1-3 Business DaysAcura Integra Switch Nh900L
Part Number: 79610-T21-C11ZA$216.93 MSRP: $309.82You Save: $92.89 (30%)Ships in 1-3 Business Days

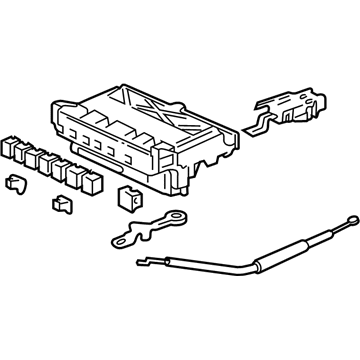

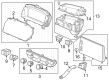
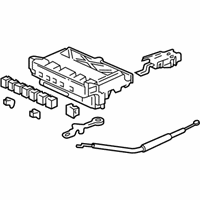
Acura Integra Control Assembly, Heater (Graphite Black) (Air Conditioner)
Part Number: 79500-ST7-A02ZA


Acura Integra A/C Switch
We provide a broad range of OEM Acura Integra A/C Switch at unbeatable prices on our website. For your OEM parts, You can count on the guaranteed quality, manufacturer's warranty, outstanding customer service, and prompt delivery. We look forward to your visit.
Acura Integra A/C Switch Parts Questions & Experts Answers
- Q: How do you remove and install the heater control panel on Acura Integra?A: To remove and install the A/C Switch in various Honda models, you should first disconnect the negative terminal of your battery, making sure that the vehicle's radio has an anti-theft system with its correct activation code. The method of removal will depend on the specific model and year range: For 1996 through 1998 Civic models what you need to do is remove driver side lower finish panel, glove box and center console lower trim. The hazard light switch, rear defogger switch and stereo must be taken off. Unscrew the screws holding down the center trim panel from the instrument panel, unplug electrical connectors and disengage center trim panel together with the A/C Switch by separating it from the air mix cable. Remove four screws which hold the A/C Switch to the center trim plate to take out the A/C unit. In 1999 and subsequent years Civic models; unscrew bolts fastening the bottom edge of the center trim plate, detach electrical connections from the radio as well as from the A/C Switch along with hazard switchgear. Release clips then pull outward on the center trim plate with attached A/C controls and radio receivers. With Integra models get rid of the hazard light switch or rear defogger switches too. The air mix cable has to be separated from the air mix control arm. Take away two screws holding the central air vent onto the instrument board before separating the central air vent having the A/C Switch still attached. One can remove a heating regulator by means of four screws that are used for attaching it to the central air vent. For CR-V models equipped with manual transaxles, remove the middle console before proceeding towards uninstalling the driver side lower finish panel, glove box, center storage bin, and finally the center console lower finishing. To get rid of either side of the central trim paneling on the instrument board just unscrew two bolts; also combine this operation with removing electric connections between the radio set & A/C Switch which are included into the middle trimming plate. After all these operations you have to take off the center trim panel having this A/C unit together with the radio receiver. The last step is always installation of the removed parts in the reverse order. After installing, start the car engine and check if its heating and cooling system works properly. For temperature control cable adjustment specific steps vary by model but usually it involves disconnecting the cable from either the heater valve arm or air mix control arm under the dash, setting extreme position for temperature control lever, adjusting cable slackness and reattaching cable and clamp as necessary for your particular model.
Related Acura Integra Parts
 Acura Integra Blower Motor
 Acura Integra Blower Motor Resistor
 Acura Integra A/C Clutch
 Acura Integra A/C Expansion Valve
 Acura Integra A/C Accumulator
 Acura Integra A/C Compressor
 Acura Integra A/C Hose
 Acura Integra A/C Idler Pulley
 Acura Integra Blend Door Actuator
 Acura Integra Evaporator